
How I organize my files in Next.js
Discover the best practices for organizing your files in Next.js

Daryl Ngako
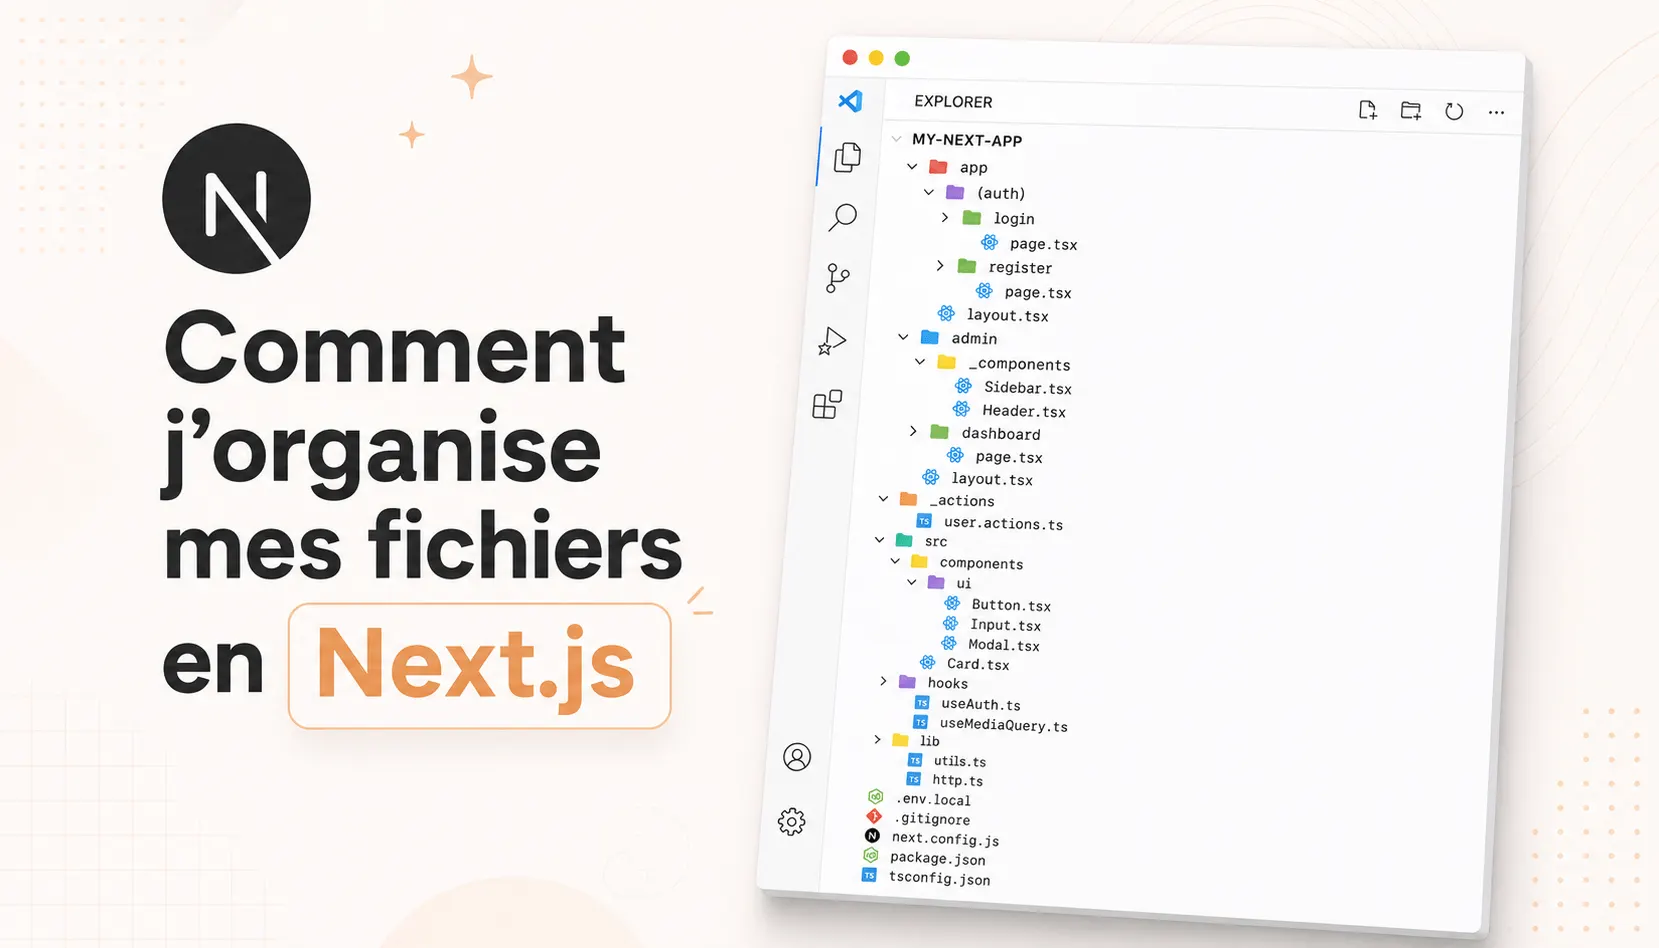
When working on a Next.js project, you can quickly find yourself with a pile of files and folders, and it can quickly become chaotic.
In this article, I show you my method for correctly structuring your projects: naming conventions and a clear separation of responsibilities (components, hooks, services, etc.), so that even a new developer can understand your code in a few minutes.
Basic structure of a Next.js project
When you create a Next.js project, you get this structure by default.
How to organize your file app
The app folder is the heart of your application. It exclusively manages routing: each subfolder becomes a route, with collocation of linked files:
- page.tsx
- layout.tsx
- error.tsx
- etc...
We avoid putting global business logic there to maintain clarity.
Colocation: the key to scalability
With Next.js it is possible to place other files like ProductList.tsx, which do not directly concern routing, inside the app folder.
Anything that is linked only to a page or a layout, you put it in app.
A concrete example:
You have a folder app/jobs/ which contains page.tsx. You will add JobsList.tsx as well as an action in apply-job.action.ts to apply for a job offer!
JobList.tsx is a component for displaying the list of job offers. It is directly linked to this page, which is why it is placed right next to it.
You will organize the file like this:
What happens when you have multiple components?
Imagine that you have other components like JobsHeader.tsx, JobsPagination.tsx, JobsAlert.tsx which are also directly linked to the offers page. That would already make a lot of files on the same level as the page.
To make the whole thing cleaner, you will create a private folder inside the app/jobs/ folder and you will put all the components linked to this page there.
Private folders
You should know that in Next.js, folders that start with a _ (underscore) are ignored by routing.
- _components/
- _actions/
- _schema/
- etc.
In case you have a page to manage products on the admin side with many components and actions, you can create folders _components and _actions:
In practice, you will have for example:
For the components:
- admin-products-add-dialog.tsx
- admin-products-list.tsx
- admin-products-edit-dialog.tsx
- admin-products-delete-dialog.tsx
- admin-products-export-data.tsx
- admin-products-filters.tsx
- admin-products-header.tsx
And for actions (Server Actions or TanStack mutations):
- admin-products-add.action.ts
- admin-products-edit.action.ts
- admin-products-delete.action.ts
Thus, your page is completely isolated from the different components and actions while being in the same folder.
Route groups (group)/
In Next.js, there is another way to structure your routes by using parentheses in the folder names.
Let's take the example of logging in and registering a user.
Rather than doing this:
- auth/login/page.tsx
- auth/register/page.tsx
Instead, do it like this:
- (auth)/login/page.tsx
- (auth)/register/page.tsx
URL level result:
- /login instead of /auth/login
- /register instead of /auth/register
How to organize the src folder?
The src folder is optional but recommended, because it will allow you to group together all the files that will be reused in several places.
Here are the main folders I use and how I organize them:
The folder lib
This folder contains all files relating to third-party libraries that I use.
The very first file you'll have in this folder is utils.ts, which contains the utility cn (an alias combining clsx and tailwind-merge).
There are also several other files there:
- auth-client.ts: relating to client-side authentication.
- auth-server.ts: relating to server-side authentication.
- image-file-validator.ts: relating to the validation of image files.
- etc.
You finally get:
The folder providers
It contains all the providers used in the application.
- theme-provider.tsx: relating to the management of the application theme.
- auth-provider.tsx: relating to user authentication.
You get this:
The folder hooks
It contains all the reusable hooks of your application.
- use-scroll-animation.ts: to manage scrolling animations.
- use-mobile.ts: relating to screen size detection.
- use-file-upload.ts: relating to file upload management.
Which gives:
The folder components
In this folder, you will place:
-
All components shadcn/ui and other libraries (Magic UI, 21st.dev) in the ui subfolder.
-
Structural components like header, footer or other layout elements in the layout subfolder.
-
All your SVGs in the svg subfolder.
-
Components reused in several places in your app in the shared subfolder.
Not forgetting the admin, users and site subfolders, which contain business components that are not directly linked to a specific page. They often serve as building blocks for other components.
For example: Take the case of an e-commerce site like Amazon. In the header we find a shopping cart and a search bar. These elements are subcomponents of the header; I would therefore place them in the site subfolder since they concern the public interface.

For the notification bell, I would place it in the users subfolder since it is directly linked to the user's profile.
You now know how to organize this folder.
Here is the final rendering:
Conclusion
In a Next.js or React project, you can quickly find yourself overwhelmed by the number of components and libraries. The real challenge is knowing how to organize them correctly in order to have clean, maintainable code that is easy to understand for you and your colleagues.
Nowadays, no one searches for a file manually in Explorer anymore: using Shift + Ctrl + P to find a file instantly is much more efficient. So don't complicate your life unnecessarily.
Here is the overall structure for an E-commerce project:
I hope you enjoyed this article!